Logitech TrackMan T-PA1-9MD Bus Mouse to NeXT non-ADB
Background:
I needed a mouse which could be used in a stationary position for
testing and this mouse is known to work with some modifications. The
instructions available are incorrect for this model. Some of the pins
will need to be changed.
Modifying the mouse
Step 1) Flip the mouse over and remove the 4 screws under the rubber bumpers. The mouse should now open.

Step 2)(optional) The circuit board is held in place by 4 plastic clips
(red arrows). Pry back on the clips and lift. Be careful with the black
plastic assembly containing the rollers. The springs may fall out of
place.
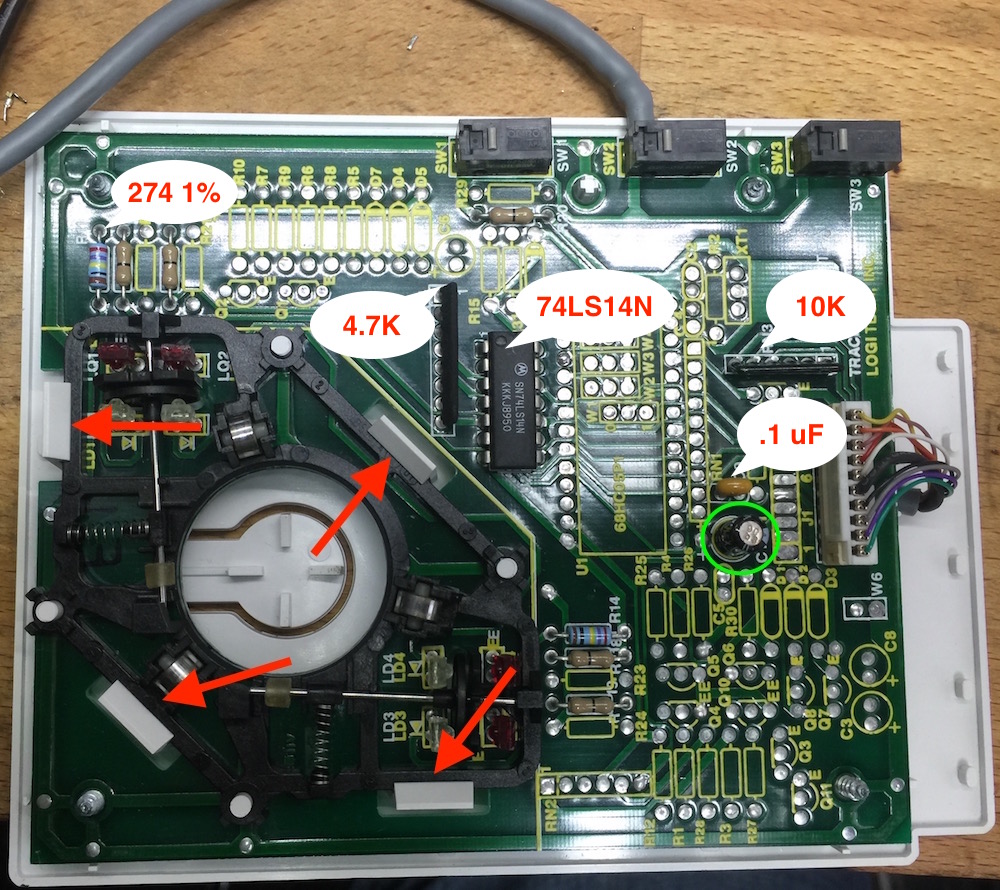
Step 3)(optional) While disassembled it would be a good idea to replace
the 10uF 35V capacitor (green). Mine showed signs of leakage.
Step 4) Cut the connector side of the cable. Wire according to the
below photos/tables. DO NOT TRUST THE WIRE COLOR ALONE. There are some
variations in the cabling. Instead use the mouse internal connector as
the guide.
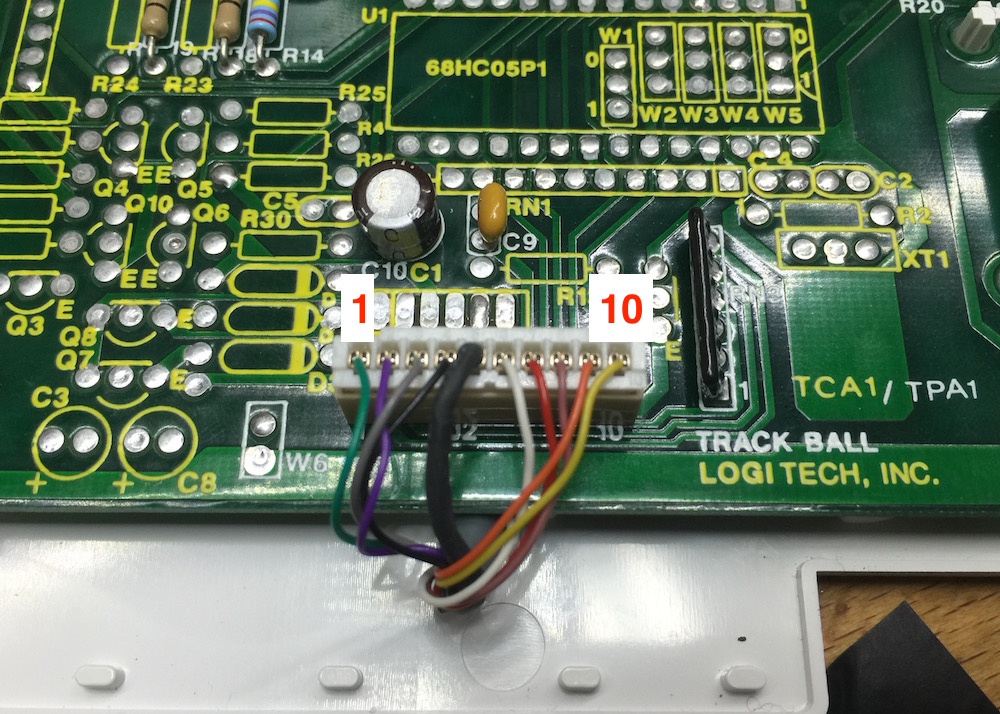
Mouse Pin
|
Color
|
Function
|
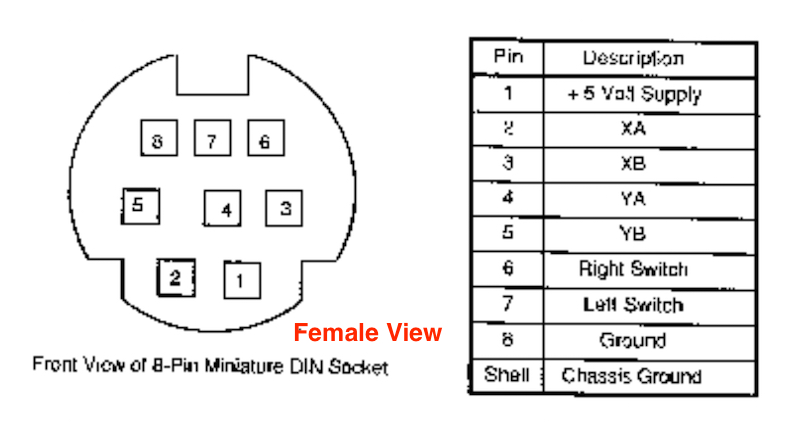
Next Female Connector
|
1
|
Green
|
Switch 1
|
7
|
2
|
Purple
|
Switch 2
|
NC
|
3
|
Gray
|
Switch 3
|
6
|
4
|
Black
|
5V
|
1
|
5
|
Black
|
Conn GND
|
connector shell
|
6
|
White
|
GND
|
8
|
7
|
Red
|
XB
|
3
|
8
|
Brown
|
XA
|
2
|
9
|
Orange
|
YA
|
4
|
10
|
Yellow
|
YB
|
5
|
Summary:
The tracking is actually much better than a NeXT original mouse. With
the proper pinout I expect this mod could be done in well under an
hour.